Export Simple Analytics Data to a Database or Data Warehouse with CloudQuery 
Introduction
This guide will show you how to export Simple Analytics data to your own database, data warehouse or data lake using CloudQuery. CloudQuery is an open source ELT platform that can load Simple Analytics data and send it to dozens of different destinations, including PostgreSQL, SQLite, BigQuery, S3, Snowflake, and many more. With your data exported, you can then do more advanced analysis or use the data in other systems.
We will show you how to export your Simple Analytics data with two examples:
- a SQLite database,
- a BigQuery Data Warehouse running on Google Cloud.
This should give you the general idea for any supported database, data warehouse or data lake. The same steps can applied with slight modifications for any other destination supported by CloudQuery. Authentication steps specific to each destination are documented in the CloudQuery documentation for the destination.
Prerequisites
To follow along with the examples, you will need:
- a Simple Analytics API key and user ID. You can create a key in your account settings. The user ID is also shown there.
- the CloudQuery CLI installed. CloudQuery is distributed as a cross-platform CLI tool, with pre-built binaries for different platforms. You can follow the installation instructions for your desired platform on the CloudQuery website by following the links below:
When the installation is complete, you should be able to run the cloudquery --help command in your terminal and see information about the available commands.
Example 1: Exporting to SQLite
The CloudQuery CLI uses configuration files to define the data sources and destinations. In this example, we will create configuration files that sync Simple Analytics data to a local SQLite database.
Step 1. Create the Source Configuration File
First, let’s create a source configuration file named simpleanalytics.yml with the following contents:
kind: source
spec:
  name: "simpleanalytics"
  path: "simpleanalytics/simpleanalytics"
  version: "v1.0.0"
  tables: ["*"]
  destinations:
    - "sqlite"
  spec:
    # plugin spec section
    user_id: "${SA_USER_ID}"
    api_key: "${SA_API_KEY}"
    period: 7d
    websites:
      - hostname: <your-website.com>
        # metadata_fields:
          # - fieldname_text
          # - fieldname_int
          # - ...
This configuration file defines a source named simpleanalytics that will sync data from Simple Analytics to a SQLite database. You can find the latest version on the releases page.
The inner plugin spec section defines the configuration specific to the Simple Analytics plugin. Here are a few of the highlights:
- The
user_idandapi_keyvalues are set to environment variables, which we will set in the next step. - The
periodvalue defines the time period for which data will be synced. We chose7dhere to fetch only the last 7 days, but you can also choose1mfor the last month,1yfor the last year, and so on, or omit this setting to fetch all your historical data. - The
websitessection defines the websites for which data will be synced. You should replace<your-website.com>with the website as defined can add multiple websites to this list. - The
metadata_fieldsis an optional list of metadata fields to sync, e.g.["fieldname_text", "fieldname_int"]. If not specified, no metadata fields will be synced. To get your available metadata_fields, check the Simple Analytics exporter. The fields are made of name + underscore + type (fieldname_text).
All the available options for the Simple Analytics CloudQuery plugin are documented in the plugin repository README.
Step 2. Create the Destination Configuration File
Next, let’s create a destination configuration file named sqlite.yml with the following contents:
kind: destination
spec:
  name: sqlite
  path: cloudquery/sqlite
  version: "v1.2.1"
  spec:
    connection_string: ./db.sql
This configuration file defines a destination named sqlite that will sync data to a SQLite database. This must be the same as the value we have in the destinations setting in the source config.
The example uses the plugin version 1.2.1, but you can find the latest version on the CloudQuery website.
The connection_string value defines the path to the SQLite database file. In this example, we will create a file named db.sql in the current directory.
Step 3. Set Environment Variables
Next, we need to set the SA_USER_ID and SA_API_KEY environment variables. You can do this by running the following commands in your terminal:
export SA_USER_ID=<your-user-id>
export SA_API_KEY=<your-api-key>
Step 4. Run CloudQuery
With the configuration files and environment variables in place, we can run CloudQuery to sync the data. Run the following command in your terminal:
cloudquery sync simpleanalytics.yml sqlite.yml
You will see a progress bar as CloudQuery syncs the data. It might take a few minutes, depending on how much data you have. When it’s done, it should look something like this:
➜ playground cloudquery sync simpleanalytics.yml sqlite.yml
Loading spec(s) from simple-analytics.yml
Starting migration with 2 tables for: simple-analytics (v1.0.0) -> [sqlite (v1.2.1)]
Migration completed successfully.
Starting sync for: simple-analytics (v1.0.0) -> [sqlite (v1.2.1)]
Sync completed successfully. Resources: 105666, Errors: 0, Panics: 0, Time: 41s
If anything goes wrong, you can inspect the cloudquery.log file to look for error messages.
Step 5. Query the data
We can now open the SQLite database file to see the data (you will need have SQLite installed for this step):
sqlite3 db.sql
To render results nicely, we can turn on the column mode and show headers:
sqlite> .mode column
sqlite> .headers on
The sync created two tables: simple_analytics_page_views and simple_analytics_events. Let’s query the simple_analytics_page_views table to see the top pages for the last 7 days:
sqlite> select path, count(*) as count from simple_analytics_page_views group by path order by count desc limit 3;
path                       count
-------------------------  ------
/                          123456
/docs                      78910
/blog/simple-analytics     11121
What you do with the data from here is up to you. You can use it to create reports, dashboards, or other visualizations.
Example 2: Exporting to BigQuery
For our second example, we will sync Simple Analytics data to BigQuery. BigQuery is a completely serverless and cost-effective enterprise data warehouse.
Prerequisites
To follow this example, you will need to have a Google Cloud Platform account and a project with BigQuery enabled. You can follow the Quickstart guide to create a project and enable BigQuery.
You will also need to have the gcloud command-line tool installed. See the official documentation for installing the gcloud CLI.
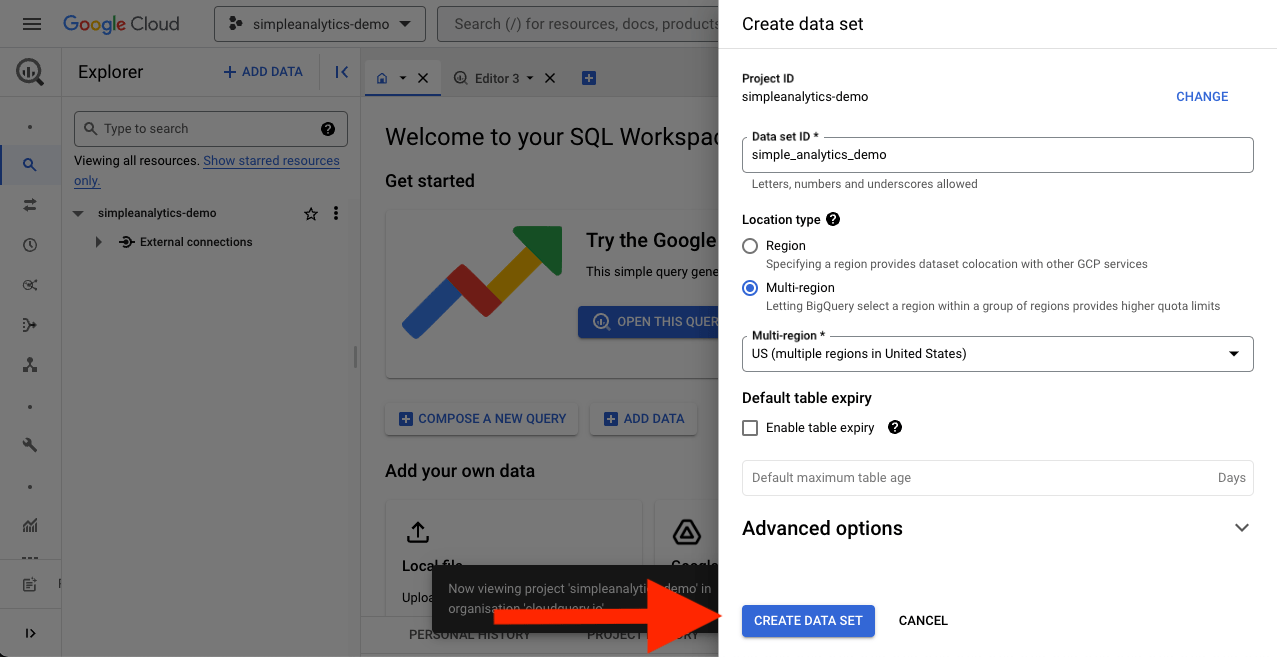
Step 1. Create an Empty BigQuery Dataset
On the BigQuery Cloud Console, expand the project menu and select your project. Then, click the Create dataset button to create a new dataset.
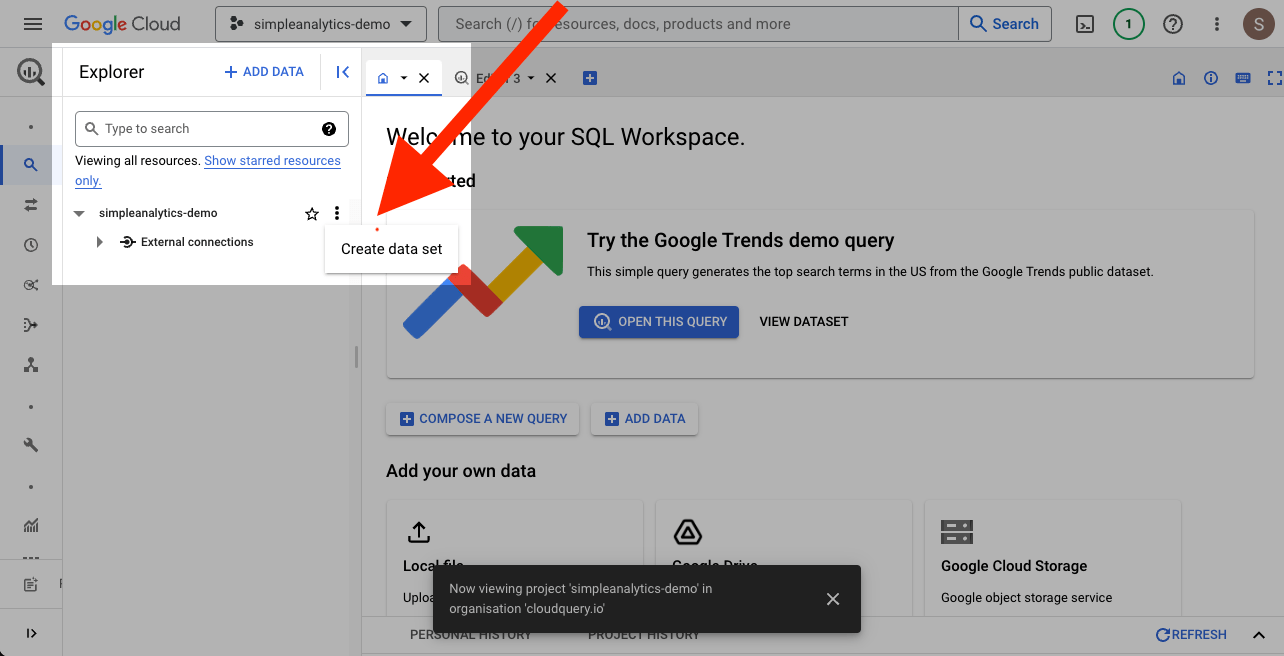
Give the dataset a name and click Create.
Step 2. Log in to Google Cloud using gcloud
Next, we need to log in to Google Cloud using the gcloud command-line tool. The CloudQuery plugin will use the same credentials to write to BigQuery. Run the following command in your terminal:
gcloud auth application-default login
Step 3. Create the Source Configuration File
Let’s create a source configuration file named simpleanalytics.yml with the following contents:
kind: source
spec:
  name: "simpleanalytics"
  path: "simpleanalytics/simpleanalytics"
  version: "v1.0.0"
  tables: ["*"]
  destinations:
    - "bigquery" # <-- this is the only change from the SQLite example
  spec:
    # plugin spec section
    user_id: "${SA_USER_ID}"
    api_key: "${SA_API_KEY}"
    period: 7d
    websites:
      - hostname: <your-website.com>
        # metadata_fields:
The only change from the SQLite example is the destinations setting, which now uses bigquery instead of sqlite.
Step 4. Create the Destination Configuration File
Next, let’s create a destination configuration file named bigquery.yml with the following contents:
kind: destination
spec:
  name: bigquery
  path: cloudquery/bigquery
  version: "v2.1.3"
  write_mode: "append"
  spec:
    project_id: ${PROJECT_ID}
    dataset_id: ${DATASET_ID}
Like with SQLite, see the CloudQuery BigQuery Plugin page for the latest version and details on the available configuration options.
Step 5. Set Environment Variables
Next, we need to set the SA_USER_ID, SA_API_KEY, PROJECT_ID and DATASET_ID environment variables. Run the following commands in your terminal, replacing the placeholders with your values:
export SA_USER_ID=<your-user-id>
export SA_API_KEY=<your-api-key>
export PROJECT_ID=<your-project-id>
export DATASET_ID=<your-dataset-id>
Step 6. Run CloudQuery
With the configuration files and environment variables in place, we can run CloudQuery to sync the data. Run the following command in your terminal:
cloudquery sync simpleanalytics.yml bigquery.yml
It should run for a few minutes, depending on how much data you have. When it’s done, it should look something like this:
➜ playground cloudquery sync simpleanalytics.yml bigquery.yml
Loading spec(s) from simpleanalytics.yml
Starting migration with 2 tables for: simpleanalytics (v1.0.0) -> [bigquery (v2.1.3)]
Migration completed successfully.
Starting sync for: simpleanalytics (v1.0.0) -> [bigquery (v2.1.3)]
Sync completed successfully. Resources: 105666, Errors: 0, Panics: 0, Time: 2m 10s
If anything goes wrong, you can inspect the cloudquery.log file to look for error messages.
Step 7. Query the data
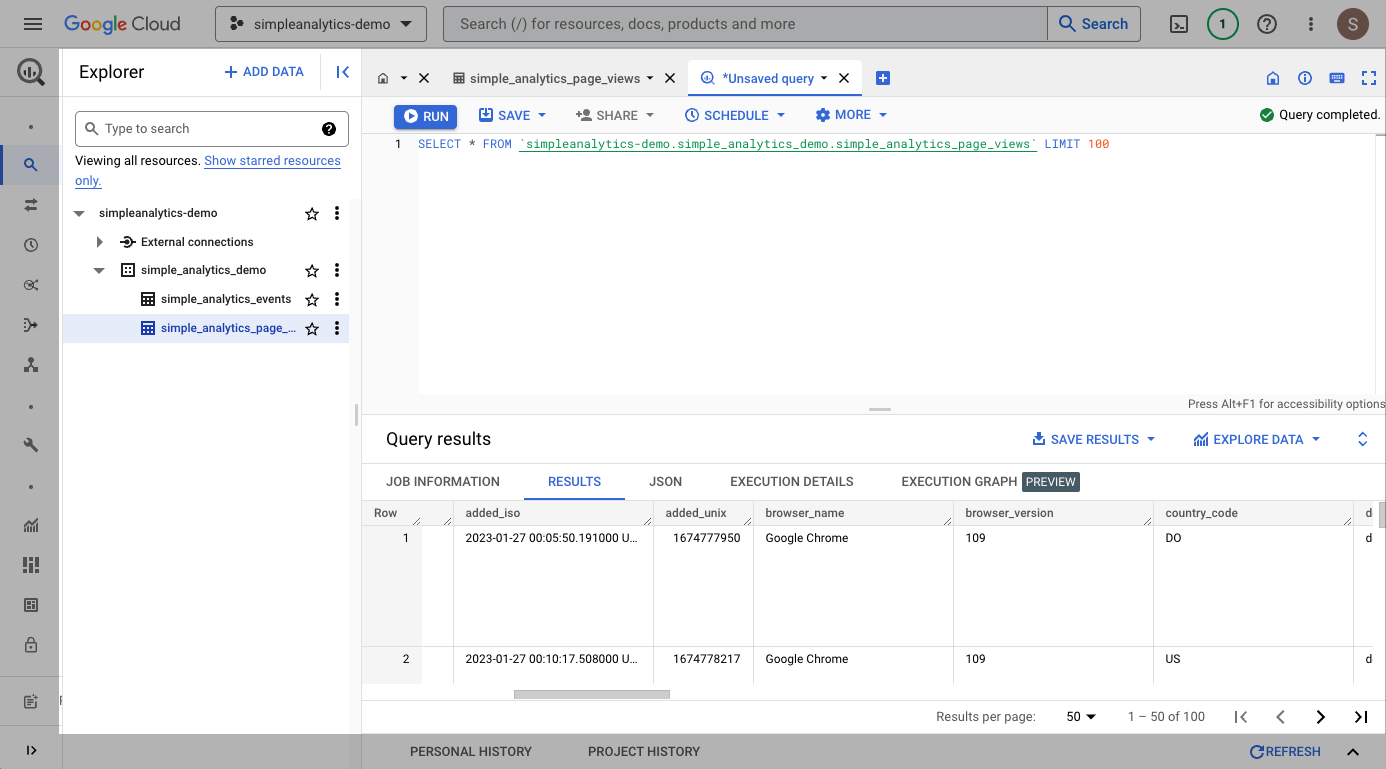
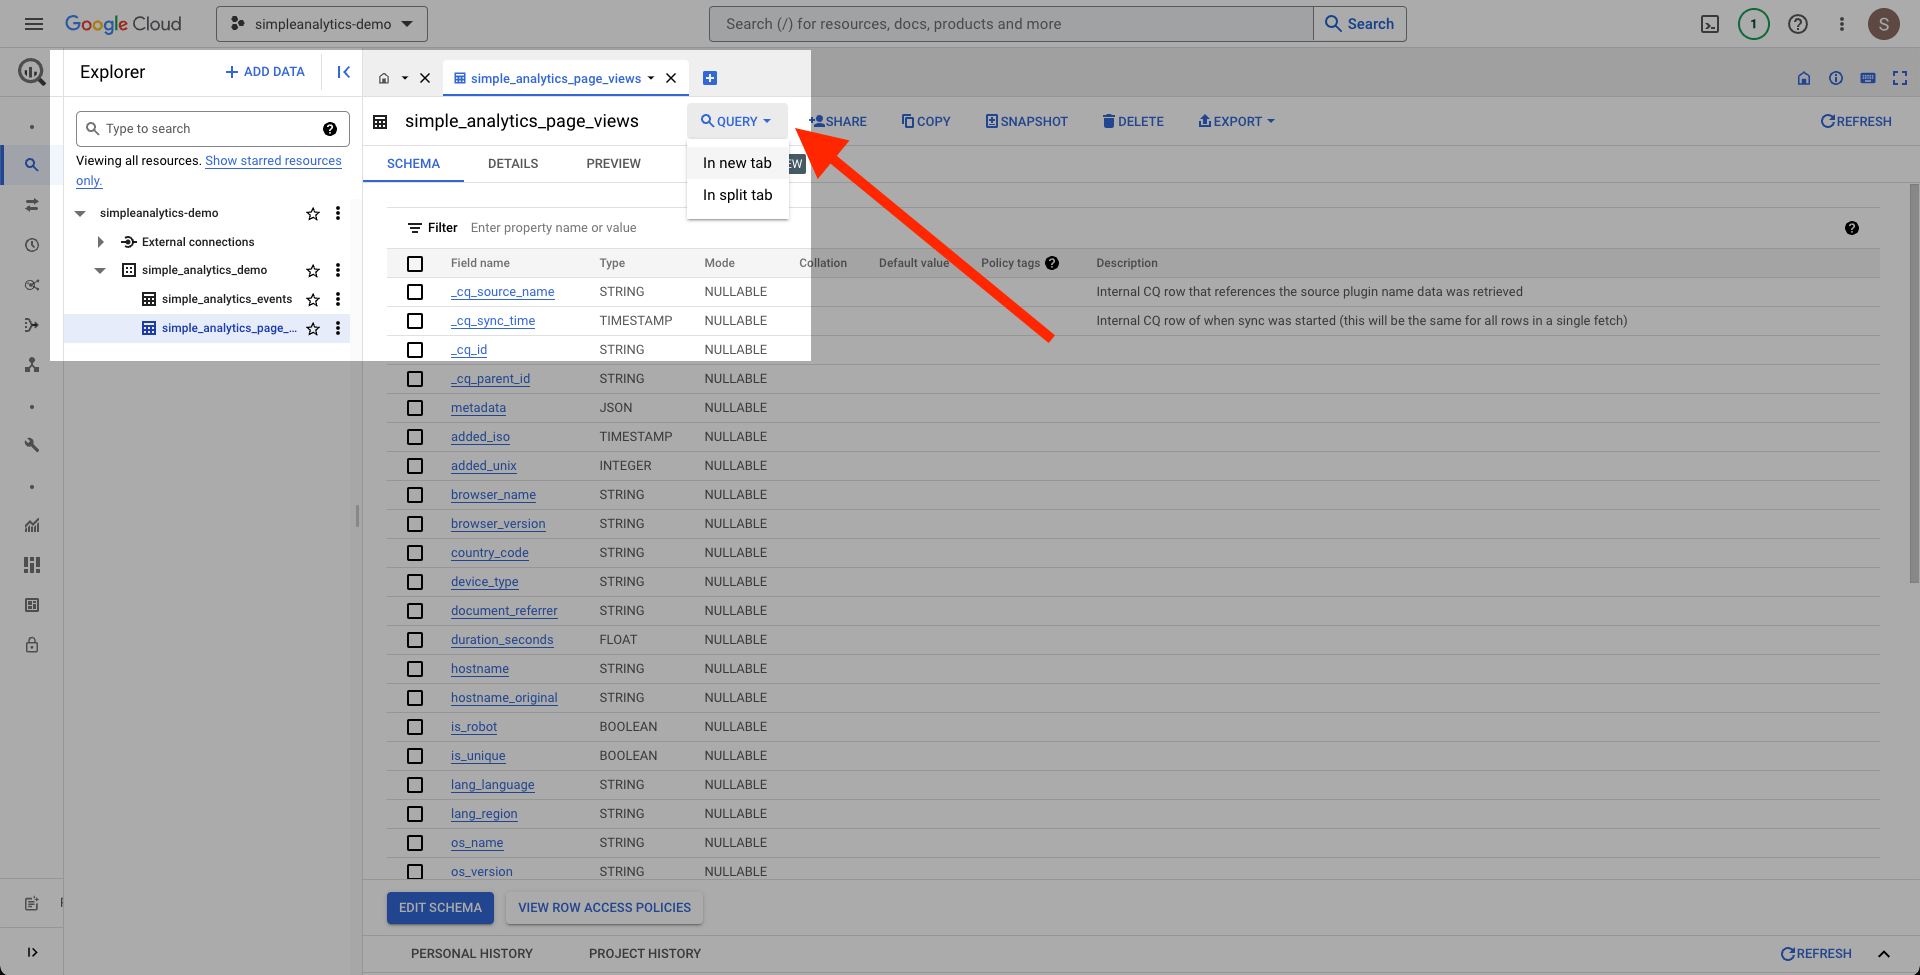
Now that the data is in BigQuery, we can query it using the BigQuery web console. Click the dataset in the sidebar to open it. Then click on the newly created simple_analytics_page_views table, and click the Query button:
Now we can run any query we like. In this example we simply explore 100 rows from the table: